


Whether led recessed ceiling lights need professional installation depends on your electrical knowledge, tools, and the ceiling type—but for most homeowners, professional help is recommended to ensure safety and proper functionality. Unlike led surface ceiling light (which often uses simple hardwiring or plug-in designs), led recessed ceiling lights require cutting holes in the ceiling, accessing electrical wiring, and securing fixtures to ceiling joists—steps that carry electrical shock risks if done incorrectly. However, high-quality models like IMIGY’s led recessed ceiling lights come with user-friendly designs (pre-wired connectors, included templates) that make DIY installation possible for those with basic skills. Below is a detailed breakdown of when to hire a pro, when to DIY, and how IMIGY’s products simplify the process—plus how they pair with other fixtures like Sofing Ceiling Lights or Gloria Ceiling Lights.
1. Key Factors That Determine If Professional Installation Is Needed
Three factors decide whether you need a pro for led recessed ceiling lights:
Electrical Knowledge: If you can’t identify live wires, use a voltage tester, or follow wiring codes, hire a professional. Led recessed ceiling lights connect directly to the home’s electrical system—mistakes (like mismatched wires) can cause fires or damage fixtures. IMIGY’s lights include color-coded wires and clear diagrams, but basic electrical understanding is still required.
Ceiling Type: Solid ceilings (concrete, brick) need specialized tools (rotary hammers) to cut holes—best left to pros. For standard drywall ceilings, DIY is feasible with a hole saw. IMIGY’s included paper templates make marking holes easy, but cutting straight lines still takes care.
Safety Compliance: Local building codes often require licensed electricians to install hardwired lighting (like led recessed ceiling lights) to ensure compliance. This is critical for homes being sold or insured—DIY installs may void warranties or fail inspections.

2. When DIY Installation Is Feasible (With IMIGY’s Help)
For homeowners with basic electrical skills and drywall ceilings, IMIGY’s led recessed ceiling lights simplify DIY installation:
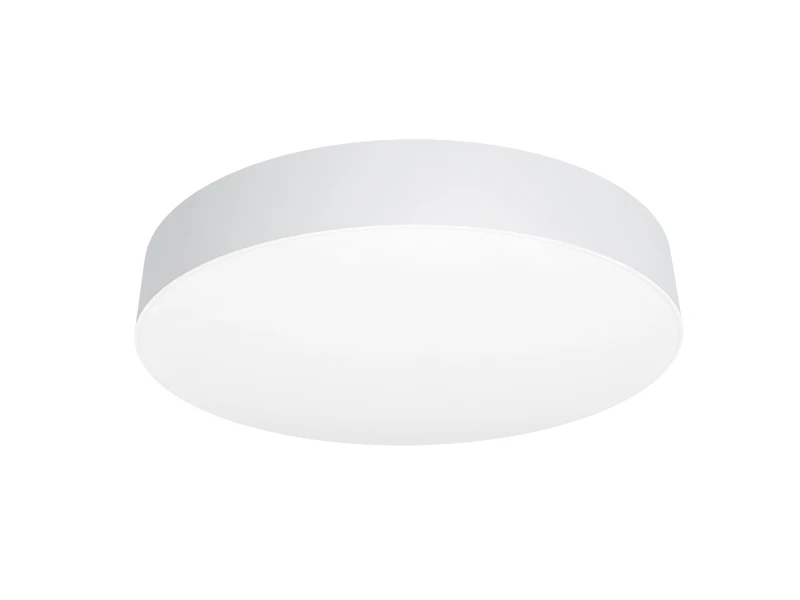
Pre-Wired & Tool-Free Connectors: IMIGY’s lights come with push-in wire connectors (no twisting or electrical tape needed) that lock wires in place—safer and faster than traditional methods. This is especially helpful for pairing with Sofing Ceiling Lights (a led surface ceiling light) in layered setups (e.g., installing recessed lights around a central Sofing light in ceiling lights for living room).
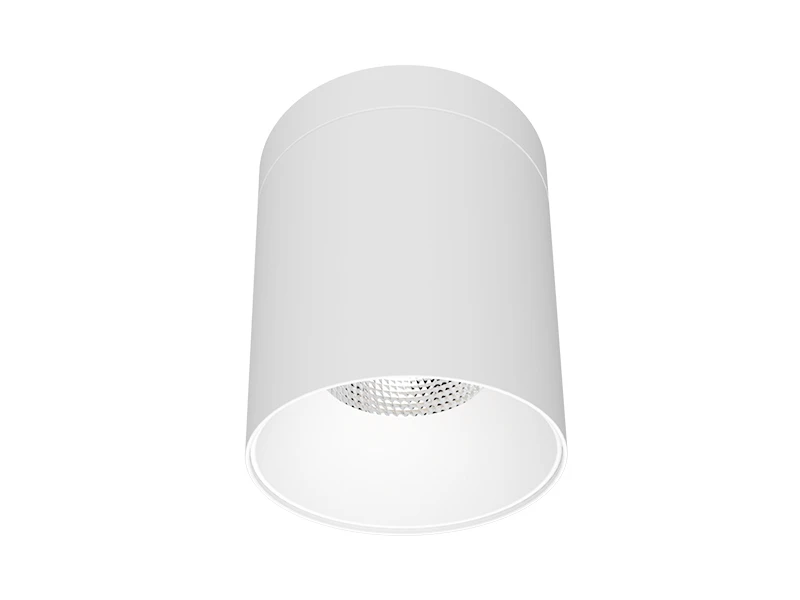
Included Templates & Slim Design: The paper template ensures you cut the exact hole size (4–6 inches), and the slim fixture body (only 5cm thick) fits easily into ceiling cavities. Unlike bulky office ceiling lighting, IMIGY’s recessed lights don’t require extra space for drivers (they’re built-in), so installation is more straightforward.
Step-by-Step Guides: IMIGY provides bilingual instructions with photos, covering everything from hole cutting to wiring. For example, installing 4-inch recessed lights in a living room takes 30–45 minutes per fixture if you have basic tools (hole saw, screwdriver, voltage tester).

3. Why Professional Installation Adds Value (Even for Simple Setups)
Even if DIY is possible, hiring a pro for led recessed ceiling lights offers key benefits:
Safety First: Pros test for live wires, ground fixtures properly, and avoid overloading circuits—risks homeowners often overlook. This is crucial for high-traffic areas like kitchens or office ceiling lighting setups, where faulty wiring could disrupt work or cause accidents.
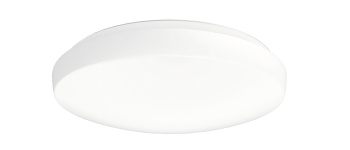
Perfect Alignment & Aesthetics: Pros ensure led recessed ceiling lights are evenly spaced, level, and flush with the ceiling—no crooked holes or gaps. This is important for cohesive designs, like pairing recessed lights with Gloria Ceiling Lights (a smart led surface ceiling light) in a modern office; uneven fixtures would ruin the sleek look.
Warranty & Code Compliance: IMIGY’s warranty covers defects, but improper installation (DIY mistakes) may void it. Pros provide certificates of compliance, ensuring the install meets local codes—essential for home value and insurance.
4. Pairing led recessed ceiling lights with Other Fixtures (Pro Tips)
Whether you DIY or hire a pro, led recessed ceiling lights work best with other fixtures—here’s how pros recommend pairing them:
With led surface ceiling light: In ceiling lights for living room, install a central Sofing Ceiling Lights (18W, 1800 lumens) and 4–6 recessed lights (12W each) around the perimeter. Pros adjust wiring to let both fixtures share a dimmer switch, creating layered ambiance.
With Office Ceiling Lighting: For open offices, pair recessed lights (18W, 1800 lumens) above desks with Gloria Ceiling Lights (24W, 2500 lumens) as ambient light. Pros zone the wiring so work areas and break areas have separate controls—boosting efficiency.
Led recessed ceiling lights don’t always need professional installation—but professional help is strongly recommended for safety, code compliance, and aesthetics, especially if you lack electrical skills or have non-drywall ceilings. IMIGY’s led recessed ceiling lights simplify DIY for capable homeowners (with pre-wired connectors, templates, and guides), but pros add value by ensuring perfect installs that pair seamlessly with led surface ceiling light models like Sofing Ceiling Lights or Gloria Ceiling Lights. Whether you DIY or hire a pro, the goal is to create safe, even lighting—whether for ceiling lights for living room or office ceiling lighting. By prioritizing safety and following IMIGY’s instructions, you’ll get the most out of your led recessed ceiling lights, enhancing both the functionality and beauty of your space.
It is recommended that you upgrade the latest browser
 Edge
Edge


