


Yes, most living room lights ceiling (especially surface-mounted models) are easy to install by yourself—you don’t need professional electrical experience, as long as you choose user-friendly fixtures, prepare basic tools, and follow safety steps. The key to easy DIY installation lies in the fixture’s design: surface-mounted living room ceiling lights (no cavity needed) are far simpler than recessed ones (which require drilling large holes), and lightweight models with clear instructions reduce hassle. As a professional lighting brand, IMIGY’s Halo Ceiling Lights (partial surface-mounted designs) and Bean Ceiling Lights (full surface-mounted, tool-free-friendly) are engineered for DIY installation, with most users completing setup in 15–30 minutes. Below is a breakdown of installation ease, product advantages, and step-by-step tips.
1. Why Most Living Room Lights Ceiling Are DIY-Friendly
a. Simple Surface-Mounted Design
No ceiling cavity required: Unlike recessed living room ceiling light fixtures (which need cutting holes and embedding), surface-mounted models (like Bean Ceiling Lights) attach directly to the ceiling surface with 2–4 screws—no complex structural work.

Lightweight materials: IMIGY’s living room lights ceiling use aluminum or high-quality plastic frames—Bean weighs only 1.2kg, Halo surface-mounted models weigh ≤2kg—one person can hold and install them, no helper needed.
b. Clear Instructions & Standardized Parts
Step-by-step guides: IMIGY products include illustrated instructions (with photos) and all necessary parts (screws, anchors, wire nuts)—no need to buy extra tools. For example, Bean Ceiling Lights’ instructions label wires clearly (“L”=live, “N”=neutral), avoiding wiring confusion.
Universal compatibility: The fixtures fit standard household electrical boxes (110V–240V), so you can replace old living room lighting fixtures directly without modifying the circuit.
2. IMIGY Products’ DIY Installation Advantages
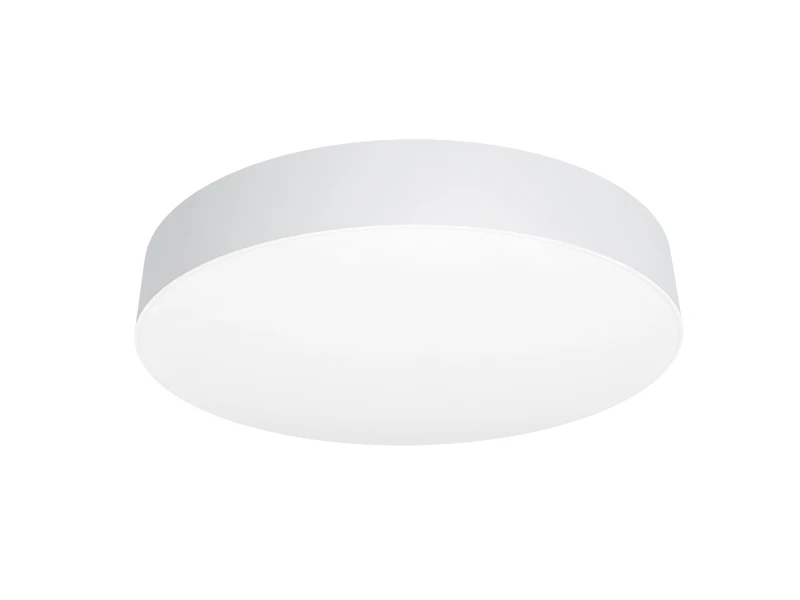
a. Bean Ceiling Lights (Easiest for Beginners)
Tool-free-friendly setup: You only need a Phillips screwdriver (no drill required for soft gypsum ceilings). The kit includes plastic anchors—twist them into the ceiling by hand, then screw in the fixture base.
3-step installation: 1) Turn off power and disconnect old fixture; 2) Fix the base to the ceiling with 3 screws; 3) Connect wires (color-coded) and snap the light body onto the base. Most users finish in 15 minutes—perfect for first-time DIYers.
Safety features: The wires have insulation sleeves, and the base has a built-in wire compartment—no exposed wires, reducing electric shock risk. It’s the ideal living room lights ceiling for renters or those avoiding complex work.
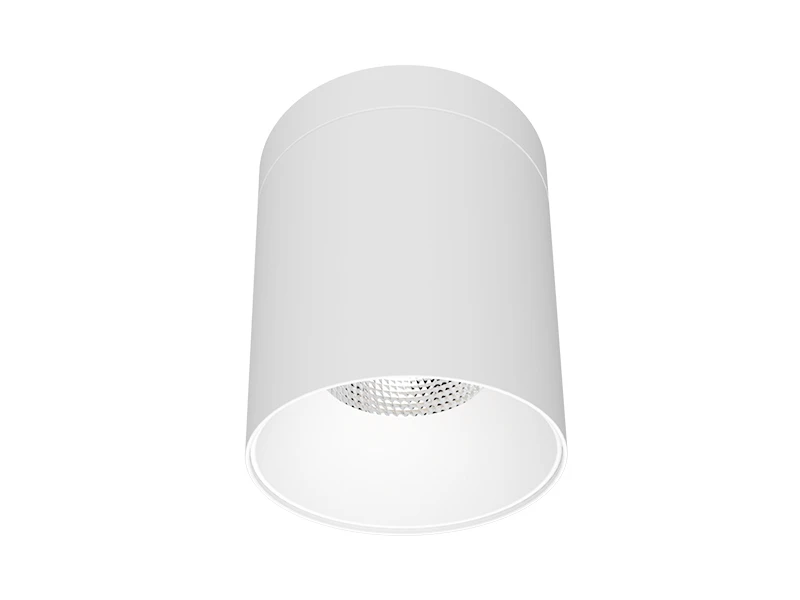
b. Halo Ceiling Lights (Dual-Install, Flexible for DIY)
Surface-mounted mode (easy): For users without ceiling cavities, Halo’s surface-mounted kit includes a pre-assembled base—install 4 screws, connect wires, and attach the light body (twist-lock design, no tools for final step). A 40cm Halo takes ~25 minutes to install.
Recessed mode (manageable for DIY): For those comfortable with drilling, Halo includes a hole template (matches the fixture size, e.g., 40cm=40cm diameter hole). Use a hole saw to cut the ceiling, pull wires through, and secure the fixture with spring clips—still doable in 30 minutes with basic drilling skills.
Dimming function pre-wired: Unlike other living room ceiling light fixtures (which need separate dimmer wiring), Halo’s dimming module is pre-installed—just connect to a standard dimmer switch (included in premium kits), saving DIY time.
3. Key Safety & Operation Tips for DIY Installation
a. Must-Follow Safety Rules
Turn off power first: Locate the circuit breaker for the living room and switch it off—use a voltage tester to confirm no electricity (critical to avoid shock). Never install living room lights ceiling with power on.
Don’t overload the circuit: Ensure the new fixture’s wattage (e.g., Bean=15W, Halo=24W) doesn’t exceed the circuit’s capacity (most household circuits handle 1000W+—safe for single fixtures).
b. Common DIY Mistakes to Avoid
Loose wire connections: Twist wires tightly and secure with wire nuts—loose wires cause flickering or short circuits. Halo’s wire nuts have a locking design, preventing this issue.
Crooked installation: Use a level to check the base before tightening screws—an uneven living room ceiling light looks unprofessional. Bean’s base has a built-in level marker for easy alignment.
4. When to Consider Professional Help
Recessed installation in concrete ceilings: Drilling concrete requires a hammer drill (not standard for DIYers)—hire a pro for this.
Circuit modifications: If your old living room lighting fixtures use non-standard wiring (e.g., no neutral wire), a professional electrician should adjust the circuit to avoid damage to Halo or Bean fixtures.
Large lobby ceiling lights: While IMIGY’s residential living room lights ceiling are DIY-friendly, oversized lobby ceiling lights (≥60cm, heavy) need professionals to ensure ceiling safety.
Most living room lights ceiling (especially surface-mounted models like IMIGY’s Bean and Halo) are easy to install by yourself—with simple tools, clear instructions, and safety precautions, even beginners can succeed. Bean Ceiling Lights are the best choice for first-timers (15-minute setup, no drill needed), while Halo Ceiling Lights offer flexibility for those wanting surface-mounted or recessed options. DIY installation saves professional fees (usually \(50–\)100) and lets you replace old living room ceiling light fixtures quickly. Remember to prioritize safety (turn off power!) and follow product guides—if you hit snags, IMIGY’s customer support provides video tutorials or phone help. Contact us to learn more about Bean and Halo’s DIY features, or get personalized tips for your specific ceiling type.
It is recommended that you upgrade the latest browser
 Edge
Edge


