


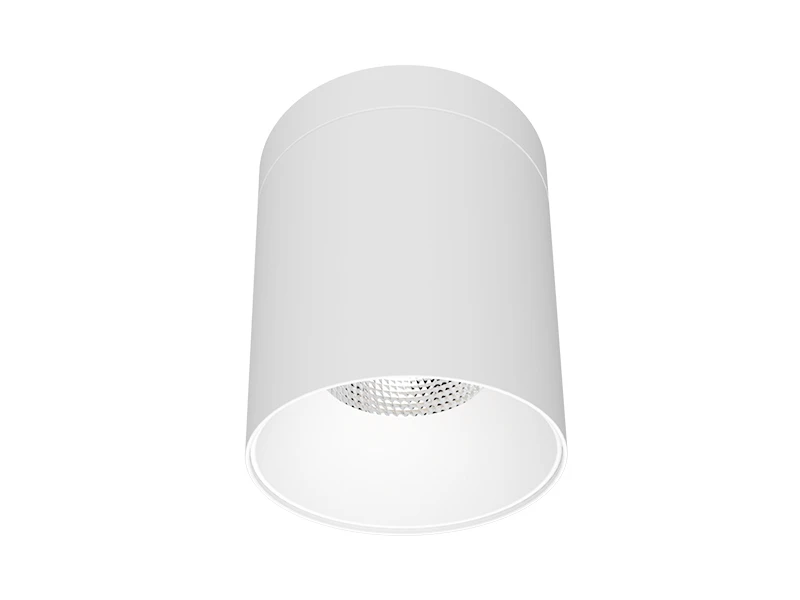


Correct installation of led down lights ensures safe operation, uniform brightness, and alignment with led downlight ceiling design—a poorly installed fixture may cause flickering, overheating, or even damage to the ceiling. The process varies slightly by installation type (recessed or surface-mounted) and product model, but core steps (preparation, wiring, fixing) remain consistent. As a professional lighting brand, IMIGY’s Legend Down Lights (entry-level, easy to install) and Explorer Down Lights (premium, dual-installation compatible) are designed for hassle-free setup, even for non-professionals. Below is a concise, step-by-step guide, paired with product-specific tips to avoid common mistakes.
1. Pre-Installation Preparation
a. Check Ceiling Conditions & Tools
Ceiling type: For recessed installation, ensure the ceiling (gypsum, wood, or concrete) has a cavity depth ≥8cm (fits most led down lights, including led downlight 3 inch models). For surface-mounted installation (e.g., low ceilings ≤2.6m), choose Explorer Down Lights (surface-mounted type) — no cavity needed.

Tools: Prepare a drill (with hole saw matching the downlight size), screwdriver, wire stripper, voltage tester, and pencil. IMIGY’s Legend Down Lights 3-inch kit includes a hole template (avoids guesswork for hole diameter: 7.6cm).
b. Confirm Product & Circuit Compatibility
Match wattage to circuit: A 10A circuit supports max 12 Legend Down Lights (15W each) or 10 Explorer Down Lights (18W each) — overloading causes tripped breakers.
For led dimmable downlights (e.g., dimmable Explorer models), ensure the dimmer switch is trailing-edge type (compatible with LEDs) — leading-edge dimmers cause flickering. Check IMIGY’s dimmer compatibility list before purchase (included in product packaging).

2. Core Installation Steps (Recessed Type, Most Common)
a. Mark & Drill Ceiling Holes
Use the hole template (included with Legend Down Lights) to mark positions on the ceiling—space holes 1.8m–2.2m apart for uniform light (e.g., 6 holes for a 20㎡ living room).
Drill holes with a hole saw: For led downlight 3 inch (Legend), use a 7.6cm saw; for 4-inch Explorer, use a 9.5cm saw. Avoid drilling near ceiling joists or wires (use a wire detector for safety).
b. Wire the Downlight
Turn off the main power (critical for safety). Use a voltage tester to confirm no electricity in the circuit.
Connect the downlight’s wires to the ceiling junction box: Match “L” (live) to “L”, “N” (neutral) to “N”, and ground wire (green/yellow) to ground (if available). Explorer Down Lights have color-coded wires (red = live, blue = neutral) for easy matching; Legend uses standard black/white wires.
Secure wire connections with wire nuts (included) — no exposed wires (risk of short circuit).
c. Fix the Downlight to the Ceiling
For Legend Down Lights: Compress the spring clips on the fixture, insert it into the hole, and release—clips expand to grip the ceiling (no screws needed).
For Explorer Down Lights (heavier, 18W): After inserting the fixture, use the included screws to secure the mounting bracket to the ceiling (adds stability, ideal for large led downlight ceiling design).
3. Installation for Surface-Mounted Type (Low Ceilings)
Choose Explorer Down Lights surface-mounted model (no cavity required). Mark mounting positions with a pencil (use a level to ensure alignment).
Drill 2–3 holes for the base, fix the base to the ceiling with screws, and connect wires (same wiring steps as recessed type).
Attach the downlight body to the base (twist-lock design for Explorer) — installation takes 10 minutes per unit, perfect for post-renovation upgrades.
4. Post-Installation Checks & Adjustments
a. Test the Fixture
Turn on the power, check if the downlight works normally: No flickering, uniform brightness. For led dimmable downlights, test dimming range (1%–100% for Explorer) to ensure smooth adjustment.
If a downlight doesn’t turn on, check wire connections (loose wires are common) or replace the LED module (IMIGY’s detachable modules make this easy—no need to remove the entire fixture).
b. Adjust for Aesthetics
Ensure the downlight is flush with the ceiling: For Legend Down Lights, press the fixture gently to align; for Explorer, adjust the mounting bracket screws.
For led downlight ceiling design (e.g., accent lighting above a sofa), tilt the Explorer Down Lights (30° adjustable angle) to focus light on the target area (wall art, decor).
5. Common Mistakes to Avoid
Don’t install without turning off power: Risk of electric shock (even experienced installers follow this rule).
Don’t use mismatched hole sizes: A hole too large causes the downlight to fall; too small damages the fixture (use IMIGY’s template for accuracy).
Don’t ignore ground wiring: Critical for safety (prevents electric shock if the fixture malfunctions) — required for Explorer Down Lights (complies with international safety standards).
Installing led down lights correctly is simple with proper preparation and adherence to steps—IMIGY’s Legend Down Lights (easy recessed installation) and Explorer Down Lights (dual-install, dimmable) simplify the process for both beginners and professionals. Whether you’re creating a minimalist led downlight ceiling design (recessed Legend) or upgrading a low-ceiling space (surface-mounted Explorer), following these steps ensures safe, efficient, and aesthetically pleasing results. For bulk installations (e.g., commercial spaces) or complex led dimmable downlights setups, contact IMIGY’s professional installation team—we also offer video tutorials (QR code on product packaging) for visual guidance. With IMIGY’s products, you get not just reliable led down lights at a competitive led down light price, but also the support to install them right the first time.
It is recommended that you upgrade the latest browser
 Edge
Edge


