


cob led downlight replacement (COB LED downlight replacement) does not always require professional tools—this depends on three key factors: the downlight’s installation structure (snap-on vs. screw-fixed), weight (lightweight ≤1kg vs. heavy ≥1.5kg), and ceiling type (gypsum board vs. concrete). Basic tools like a Phillips screwdriver or flathead screwdriver may be needed for old screw-fixed ceiling recessed downlight (e.g., outdated non-COB models). However, premium best led downlight like IMIGY’s Explorer Down Lights and Melody Down Lights (both COB models) feature snap-on designs and lightweight bodies, allowing replacement with just hands or a simple plastic pry tool (included in the package). These fixtures also adapt to diverse ceiling down light installations, from residential led recessed downlight to commercial setups. The following breaks down tool requirements and our products’ advantages.
1. Key Scenarios for Tool Use (or Not)
a. Scenarios That Don’t Require Professional Tools
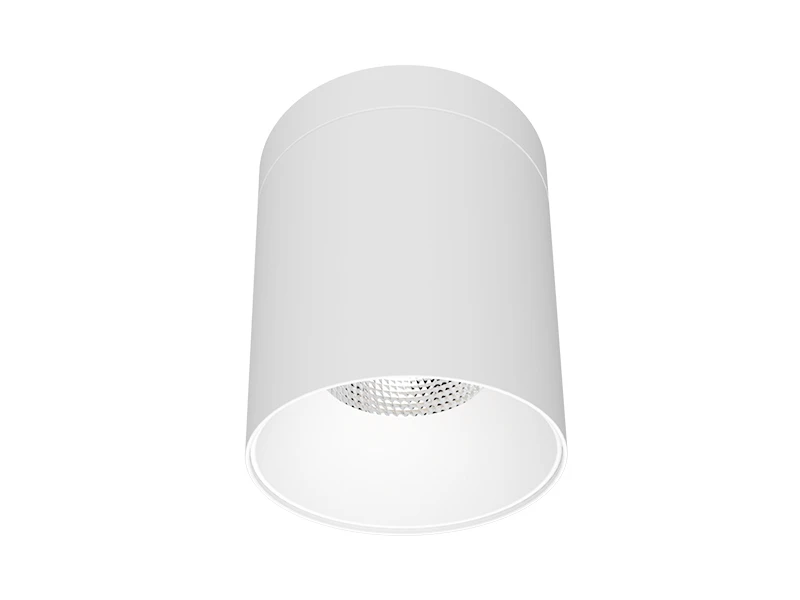
Snap-on ceiling recessed downlight: IMIGY’s Explorer Down Lights (COB, 0.8kg) use spring-loaded snap-on brackets—press the brackets inward to remove the old light, then align the new light’s brackets with the ceiling hole and push until it clicks. No tools needed, even for gypsum board ceilings.
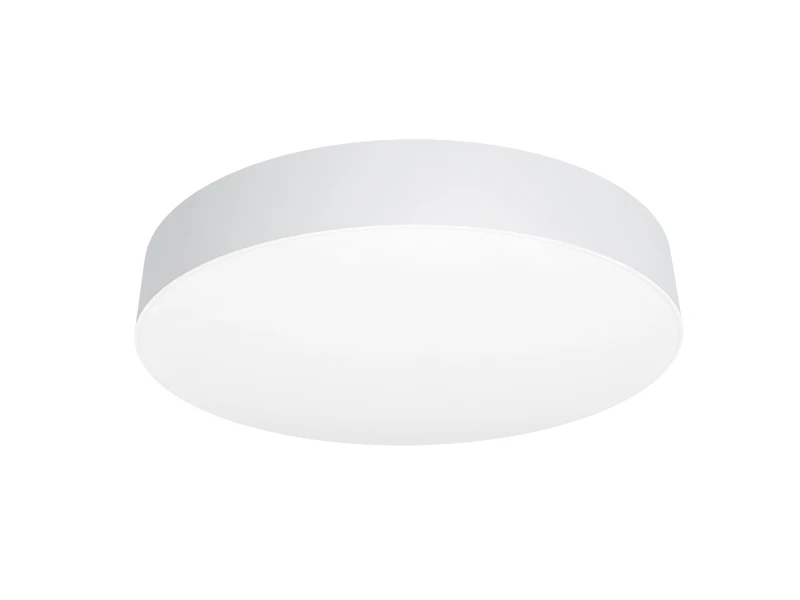
Lightweight led recessed downlight: Melody Down Lights (COB, 0.6kg) are so light that you can hold them with one hand during replacement. Their smooth edge design avoids scratching the ceiling, eliminating the need for protective tools (common with heavy downlights).
b. Scenarios Needing Basic Tools (Not Professional Ones)
Screw-fixed old downlights: If replacing a traditional ceiling down light with screws, use a Phillips screwdriver to remove 2–3 fixing screws (5 minutes max). IMIGY’s replacement downlights (e.g., Explorer Down Lights) fit existing screw holes, so no new drilling is needed.
Concrete ceiling installations: For ceiling recessed downlight in concrete ceilings, a plastic pry tool (included with IMIGY products) helps loosen the old light from the ceiling—no power tools like drills or hammers required.
2. IMIGY Products’ Replacement Advantages

a. Explorer Down Lights (Residential-Grade cob led downlight replacement)
Tool-Free Snap-on Design: Spring-loaded metal brackets (instead of screws) let you replace the downlight in 2 minutes—no need for screwdrivers. The brackets fit 75mm–100mm ceiling holes (standard for most ceiling down light), so you can replace old non-COB downlights without modifying the ceiling.
Lightweight & Safe: 0.8kg body (half the weight of generic led recessed downlight) reduces hand fatigue during replacement. The COB chip’s compact design (no bulky heat sink) makes the light easy to handle, unlike heavy best led downlight that require two hands or clamps.
Compatibility: Works as a direct replacement for old ceiling recessed downlight (e.g., halogen or non-COB LED models). The included wire connector (push-in type) lets you connect wires without wire strippers—just insert the wires and press the lever, saving time vs. traditional twist-on connectors.
b. Melody Down Lights (Commercial-Grade cob led downlight replacement)
Basic Tool Only: If replacing screw-fixed commercial ceiling down light, a single Phillips screwdriver (included in the package) is enough to remove old screws. The downlight’s pre-marked alignment lines help you position it correctly in 1 minute—no level tool needed.
Durable & Easy to Handle: The aluminum alloy housing (scratch-resistant) can be gripped directly during replacement (no gloves required, unlike sharp-edged generic downlights). Its COB chip delivers 120lm/W high efficiency, making it a top best led downlight for commercial spaces like offices or retail stores.
Wide Ceiling Adaptation: Fits 90mm–120mm ceiling holes (common in commercial led recessed downlight). The included foam gasket (for dustproofing) is pre-attached to the light, so you don’t need to install it separately—simplifying replacement further.
3. Practical Tips for Replacement
a. Preparation
Turn off the power at the circuit breaker (critical for safety—never replace cob led downlight replacement with power on).
Gather basic tools (if needed): Phillips screwdriver, plastic pry tool (both included with IMIGY products). For old downlights with stuck brackets, a small flathead screwdriver helps loosen them.
b. Replacement Steps
Remove the old light: For snap-on models, press the brackets inward and pull down; for screw-fixed models, remove screws and pull gently.
Connect wires: Use the included push-in connector (IMIGY products) to connect the downlight’s wires to the ceiling wires (match black to black, white to white).
Install the new light: Align with the ceiling hole and push (snap-on) or screw in (screw-fixed)—done in 5 minutes max.
4. Mistakes to Avoid
Don’t Use Power Tools: Drills or hammers are unnecessary for cob led downlight replacement—they risk damaging the ceiling or the new downlight (e.g., Explorer Down Lights’ plastic components).
Don’t Ignore Wire Connections: Never twist wires together without a connector—use the included push-in connector to prevent short circuits, unlike cheap led recessed downlight that skip this accessory.
Don’t Force the Light: If the new downlight doesn’t fit the ceiling hole, check the hole size (IMIGY’s fit 75mm–120mm)—don’t file the hole or bend the brackets (this breaks the light).
cob led downlight replacement rarely requires professional tools—premium models like IMIGY’s Explorer Down Lights (tool-free) and Melody Down Lights (basic tools only) simplify the process for both homeowners and commercial users. These best led downlight options fit standard ceiling down light holes, work with existing wiring, and eliminate the need for expensive professional tools or services. Whether replacing residential ceiling recessed downlight or commercial led recessed downlight, our products make replacement quick, safe, and accessible to anyone—no prior experience needed. Contact us to get the right cob led downlight replacement for your ceiling type, and we’ll provide a step-by-step guide to ensure smooth installation.
It is recommended that you upgrade the latest browser
 Edge
Edge


