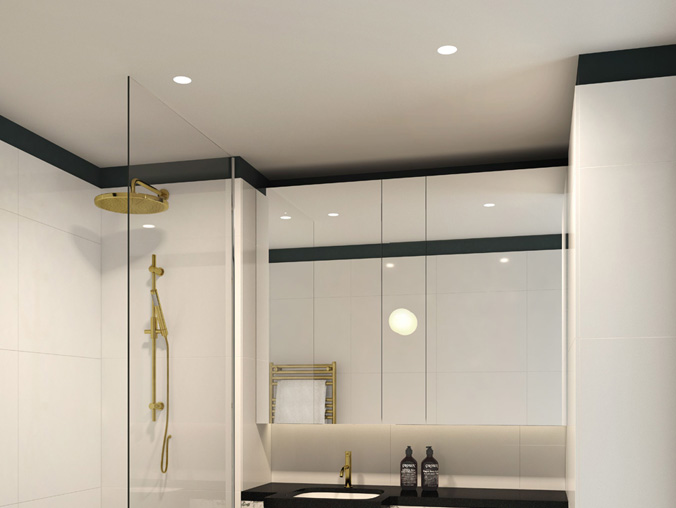

No, Ceiling Recessed Downlight is not difficult to install—especially with modern, user-friendly designs that simplify key steps like hole-cutting, wiring, and fixing. Traditional recessed downlights often required professional tools (e.g., hole saws) and electrical expertise, leading to the misconception of difficulty. However, advanced models (like IMIGY’s) now feature tool-free installation, clear guides, and lightweight structures, making it achievable for DIY users. As a leading provider, IMIGY Lighting’s Legend Down Lights and Explorer Down Lights (top-tier Best Downlights) are engineered for easy installation, compatible with both new renovations and post-installation setups. They also pair seamlessly with Dimmable Downlight LED systems and even Down Light Kitchen models for unified home lighting. The following breaks down installation difficulty and our products’ advantages.
1. Key Factors Reducing Installation Difficulty
a. Simplified Hole-Cutting
Modern Ceiling Recessed Downlight comes with matching hole templates (marked with diameter) and supports standard hole saw sizes (e.g., 10–15cm for living rooms). No professional measuring tools are needed—just trace the template and cut.
b. Tool-Free Fixing
Spring clips or snap-on structures replace screws. After inserting the downlight into the hole, the clips pop open to secure it—no drilling or screwdriving required.
c. Clear Wiring Guides
Color-coded wires (red for live, blue for neutral) and simple plug-in connectors eliminate confusion. Even users without electrical experience can follow the manual to connect correctly.
2. IMIGY Products’ Installation Advantages
a. Legend Down Lights
As a slim Ceiling Recessed Downlight (7cm depth) and premium Dimmable Downlight LED, it simplifies installation in three steps:
Use the included 12cm-diameter template to mark and cut the ceiling hole (fits most drywall/wooden ceilings).
Connect the color-coded wires (plug-in design, no stripping needed) to the power supply.
Push the downlight into the hole—spring clips secure it automatically. Total time: 10 minutes. It’s lightweight (150g), so one person can handle installation alone, and it works with Ceiling Down Light setups for layered lighting.

This versatile Best Downlights model (9cm depth) is optimized for both new and existing ceilings. It includes an adjustable hole template (14–16cm diameter) to fit uneven ceiling thicknesses. The wiring uses a detachable terminal block—even if you’re replacing old Ceiling Recessed Downlight, you can reuse existing wires. Its anti-slip spring clips (stronger grip) prevent loosening over time. For open spaces, it pairs with Down Light Kitchen models easily, as both follow the same simple installation process.
3. Installation Tips for Different Scenarios
a. New Renovations
Install Ceiling Recessed Downlight during ceiling construction: Pre-mark holes based on the downlight’s spacing (80–120cm) and run wires in advance. IMIGY’s Legend and Explorer fit 10–18cm ceiling cavities, matching most renovation standards.
b. Post-Installation (Existing Ceilings)
Use a battery-powered hole saw (affordable and easy to use) to cut holes. Choose lightweight Best Downlights (like Legend, 150g) to avoid damaging the ceiling. For wiring, use wire connectors to link to existing ceiling wires—no need to rewire the entire room.
c. Avoid Common Mistakes
Don’t cut holes too large: Follow the template—over-sized holes cause the downlight to fall.
Check wire connections: Ensure live/neutral wires are correctly matched (IMIGY’s color-coding prevents errors).
Test before fixing: Turn on the power to confirm the Dimmable Downlight LED works, then secure the downlight.
4. Comparison with Surface-Mounted Ceiling Down Light
a. Versus Ceiling Down Light (Surface-Mounted)
Surface-mounted Ceiling Down Light requires drilling screws into the ceiling, which may damage decor. Ceiling Recessed Downlight (like IMIGY’s) uses spring clips, leaving no visible marks. For low ceilings, recessed models also avoid the “bulky” look of surface-mounted ones.
b. Time & Effort
Installing one Legend Down Lights takes 10 minutes, while surface-mounted Ceiling Down Light takes 15–20 minutes (due to drilling). For multi-unit setups (e.g., 6 downlights in a living room), recessed models save more time.
Ceiling Recessed Downlight is not difficult to install—modern designs like IMIGY’s Legend Down Lights (slim, tool-free, fast) and Explorer Down Lights (versatile, adjustable, user-friendly) have simplified the process for DIY users. As top-tier Best Downlights, they integrate with Dimmable Downlight LED systems and Down Light Kitchen models seamlessly, ensuring a unified lighting look without installation hassle. Whether you’re renovating or upgrading existing lighting, our Ceiling Recessed Downlight balances functionality, aesthetics, and ease of installation. Contact us to get installation guides or personalized advice for your Ceiling Recessed Downlight setup.
It is recommended that you upgrade the latest browser
 Chrome
 Firefox
 Edge
Edge