


Replacing the bulb of a led downlight ceiling fixture is a straightforward process with proper steps, ensuring safety and efficiency. Whether it’s a best led downlights for living room like Explorer Down Lights or a down light kitchen staple like Melody Down Lights, the method adapts slightly to the fixture’s design. The following guides you through the process, highlighting tips for IMIGY products.
1. Safety Preparations
a. Power Off Completely
Turn off the circuit breaker for the led downlight ceiling fixture, not just the light switch. This prevents electric shock when handling bulbs, especially important for dimmable led downlights like Explorer Down Lights with wiring connections near the bulb.
b. Let the Fixture Cool
If the light was recently on, wait 10-15 minutes for the bulb to cool. This avoids burns, crucial for Melody Down Lights in down light kitchen setups where heat can accumulate near stovetops.
2. Removing the Old Bulb
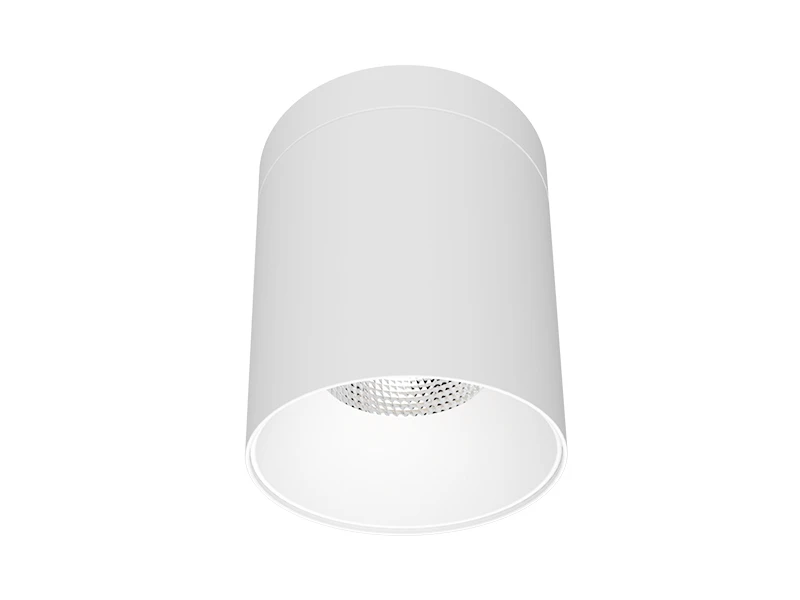
a. For Explorer Down Lights
Gently pull the trim ring of this best led downlights for living room fixture outward—no tools needed. Once the ring is loose, the bulb (integrated or replaceable) will be visible. Twist it counterclockwise to detach from the socket, taking care not to damage the surrounding led downlight ceiling housing.
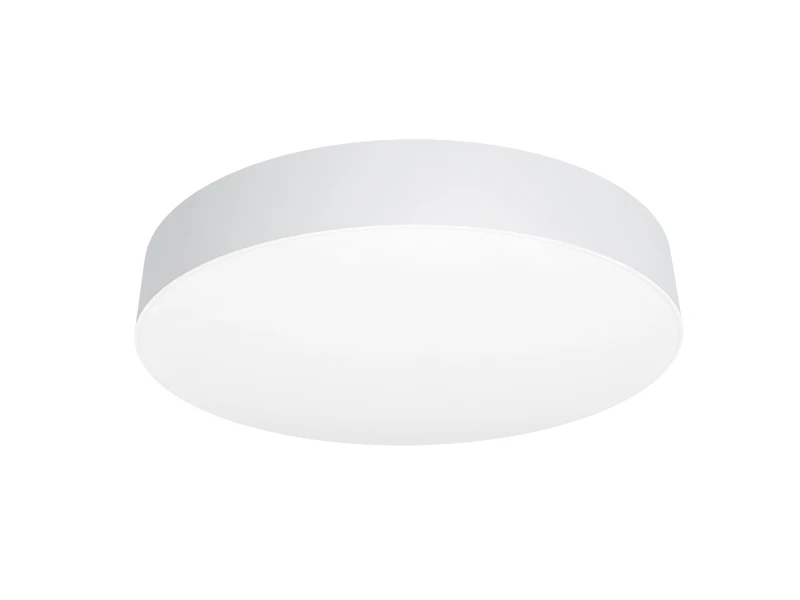
b. For Melody Down Lights
In down light kitchen setups, press the two spring clips on the sides of the fixture to release the bulb assembly. Pull the assembly down slightly, then twist the bulb clockwise to remove. This design, common in task-oriented down light kitchen fixtures, ensures easy access.
3. Installing the New Bulb
a. Matching Bulb Specifications
Use a bulb that matches the wattage and base type of the original. For Explorer Down Lights (a dimmable led downlight), opt for dimmable-compatible bulbs to maintain functionality. For Melody Down Lights, choose bulbs rated for kitchen use (resistant to moisture and heat).
b. Securing the New Bulb
Insert the new bulb into the socket and twist clockwise until tight. For Explorer Down Lights, push the trim ring back into place until it clicks. For Melody Down Lights, reattach the spring clips to secure the assembly—ensure it sits flush with the led downlight ceiling surface.
4. Post-Replacement Checks
a. Test the Light
Turn the circuit breaker back on and switch on the light to verify the new bulb works. For dimmable led downlights, test the dimmer function to ensure smooth operation, a key feature of best led downlights for living room setups.
b. Inspect for Stability
Check that the trim ring or assembly is firmly attached to prevent loosening, especially in down light kitchen areas with frequent movement or vibrations from appliances.
5. Tips for IMIGY Products

As a best led downlights for living room fixture, its bulb is designed for easy replacement. Spare bulbs are available via IMIGY, ensuring compatibility with its dimmable led downlight system. Avoid using non-dimmable bulbs, as they may cause flickering.

This down light kitchen fixture’s bulb is heat-resistant, so always replace it with the same model to maintain safety. Pairing with IMIGY’s recommended bulbs preserves the fixture’s lifespan and performance in busy kitchen environments.
Replacing a led downlight ceiling bulb involves simple steps: power off, cool down, remove the old bulb, install the new one, and test. IMIGY’s Explorer Down Lights (best led downlights for living room) and Melody Down Lights (down light kitchen) simplify the process with user-friendly designs. By following these steps, you’ll ensure the fixture works reliably, maintaining optimal lighting in your space. For further assistance, contact our team for bulb specifications or troubleshooting.
It is recommended that you upgrade the latest browser
 Edge
Edge


