


In the world of interior lighting, round ceiling light fixtures have gained popularity for their smooth curves and unique charm, adding a touch of elegance to various spaces. However, when it comes to installing round ceiling light, ensuring it is centered and aesthetically pleasing can be a challenge. At IMIGY Lighting, our Halo Ceiling Lights and Gloria Ceiling Lights, as exquisite modern led ceiling light products, not only feature stunning designs but also offer excellent installation adaptability. In this article, we will explore the key installation points of round ceiling light fixtures, guiding you to achieve a perfect installation that combines both functionality and beauty.
1. Preparation Before Installation
a. Check the Product and Tools
Before starting the installation of your round ceiling light, carefully inspect the product components. Our Halo Ceiling Lights and Gloria Ceiling Lights come with detailed installation kits, including mounting brackets, screws, and instruction manuals. Ensure all parts are in good condition. Also, prepare essential tools such as a screwdriver, a level, and a tape measure.

b. Turn Off the Power
Safety is a top priority. Always turn off the power supply at the circuit breaker before installing any room roof light, including round ceiling light fixtures. This step prevents the risk of electric shock during the installation process.
2. Determining the Center Position
a. Measure the Room Dimensions
For a perfect - centered round ceiling light, start by measuring the length and width of the room. Use a tape measure to find the mid - points of each side of the ceiling. Mark these points clearly. For example, when installing Gloria Ceiling Lights in a bedroom, precise measurement ensures the light is positioned right above the center of the bed, creating a balanced look.

b. Use a String or Laser Tool
To accurately mark the center of the ceiling, you can use a string or a laser tool. Stretch a string diagonally from one corner of the ceiling to the opposite corner, and do the same for the other two corners. The intersection point of the two strings is the center. Alternatively, a laser level can provide a more accurate and convenient way to mark the center, which is especially useful when installing Halo Ceiling Lights in large living rooms.
3. Mounting the Bracket
a. Align with the Center Mark
When installing the mounting bracket of the round ceiling light, align it precisely with the center mark on the ceiling. For Halo Ceiling Lights, make sure the bracket is perfectly level using a spirit level. Secure the bracket firmly with screws, ensuring it can support the weight of the light fixture.
b. Check for Stability
After mounting the bracket, give it a gentle shake to check for stability. A stable bracket is crucial for the safe installation of modern led ceiling light fixtures like Gloria Ceiling Lights. If the bracket wobbles, tighten the screws or adjust its position as needed.
4. Installing the Light Fixture
a. Connect the Wiring
Before attaching the round ceiling light fixture, connect the electrical wires according to the instruction manual. Our smart ceiling light models, such as some versions of Halo Ceiling Lights, may have additional wiring for smart functions. Follow the wiring diagram carefully to ensure proper connection.
b. Attach the Light to the Bracket
Once the wiring is done, attach the round ceiling light to the mounted bracket. For Gloria Ceiling Lights, ensure that the light fixture is properly seated on the bracket and all connections are secure. Double - check the alignment to make sure the light is centered and looks aesthetically pleasing.
5. IMIGY Lighting’s Product Highlights
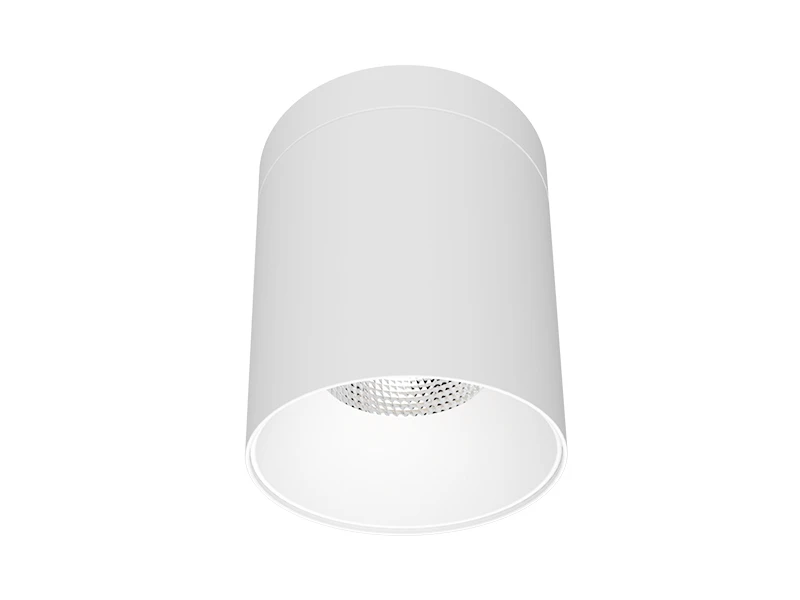
a. Halo Ceiling Lights
Our Halo Ceiling Lights are outstanding round ceiling light fixtures. With their sleek and modern design, they serve as both modern led ceiling light and smart ceiling light options. The installation process is user - friendly, and their unique halo - shaped structure can be easily centered on the ceiling, adding a focal point to any room.
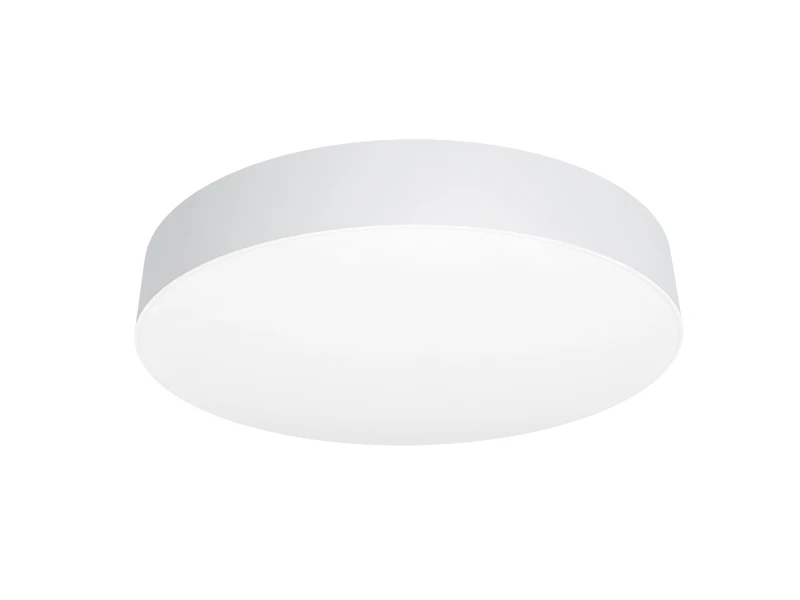
b. Gloria Ceiling Lights
The Gloria Ceiling Lights combine elegance with practicality. As round ceiling light products, they feature a simple yet sophisticated design that fits well with various interior styles. Whether you are replacing an old room roof light or installing a new one, Gloria Ceiling Lights offer easy installation and a perfect centered look, enhancing the overall aesthetics of the space.
6. Why Choose IMIGY Lighting?
Innovative Design: Our round ceiling light products, including Halo Ceiling Lights and Gloria Ceiling Lights, are designed with both style and installation convenience in mind. Their innovative designs ensure a perfect balance between centering and aesthetics.
Quality Assurance: Made from high - quality materials, our modern led ceiling light fixtures guarantee long - lasting performance. The sturdy construction of Halo Ceiling Lights and Gloria Ceiling Lights ensures they remain securely centered and maintain their beauty over time.
Customer Support: Our team provides comprehensive support, from product selection to installation guidance. If you encounter any difficulties during the installation of round ceiling light fixtures, we are here to help you achieve a successful and beautiful installation.
Installing round ceiling light fixtures while ensuring centering and aesthetics requires careful preparation and precise installation steps. With IMIGY Lighting’s Halo Ceiling Lights and Gloria Ceiling Lights, you can simplify this process. Whether you are looking to upgrade your room roof light with a modern led ceiling light, replace an old fixture, or enjoy the convenience of a smart ceiling light, our products offer the perfect solution. Follow the installation key points outlined in this article, and let our round ceiling light fixtures transform your space into a beautifully illuminated and visually appealing haven.
It is recommended that you upgrade the latest browser
 Edge
Edge


